Simple Wall-Mount Power Switch for rPi – pt3
Part 3: Completion
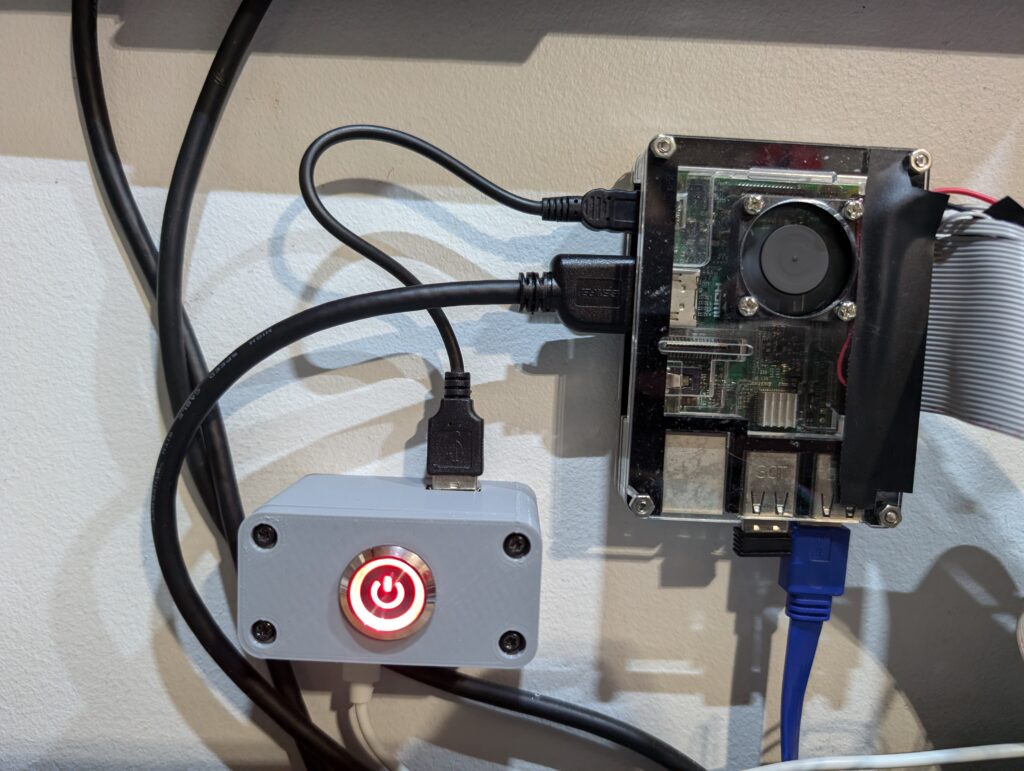
With the 3d print officially working, came more project advancement! I’m glad to report that the wall switch is now complete !
As a first project in fusion 360, I think it worked out ok but I will definitely need to practice further more. Going back in the design to do fixes was painful since I don’t have the workflow memorized yet but I still did it with very minimal tweaks in blender. I still think the learning curve is kinda intense coming from the other software that is not a CAD software..
I also had to lightly melt the plastic where the USB-C connector was going since silly me forgot that the soldered pins would be in the way. *Oups*

after a fair bit of struggling to get the complements in, it ended up all fitting nicely. The USB-A is actually screwed at the bottom with a brass inserts and the USB-C is glued down with hot glue ( I picked a breakout boards that didn’t had mounting holes… That one is on me). The rest is the switch that looks completely lovely and is super satisfying to click. And once it’s screened to the wall, it looks really cool. The only thing I would maybe change is the filament color.

also the brass inserts for the top with the screws in recess, gives it a much more professional look that I was expecting. I might do that a bit more often.
Hope you enjoyed!