Thermostat hacking?
Can’t win them all, right?
So, I’ve been donated some old thermostats from a coworker and one of them had a stuck button, I had to open it to unjam it and in the process, I moved the LCD screen connector and kinda ruined it ( these rubber connectors are SOOOOO temperamental… ) . Since it was not really usable anymore, I thought I’d experiment with it.
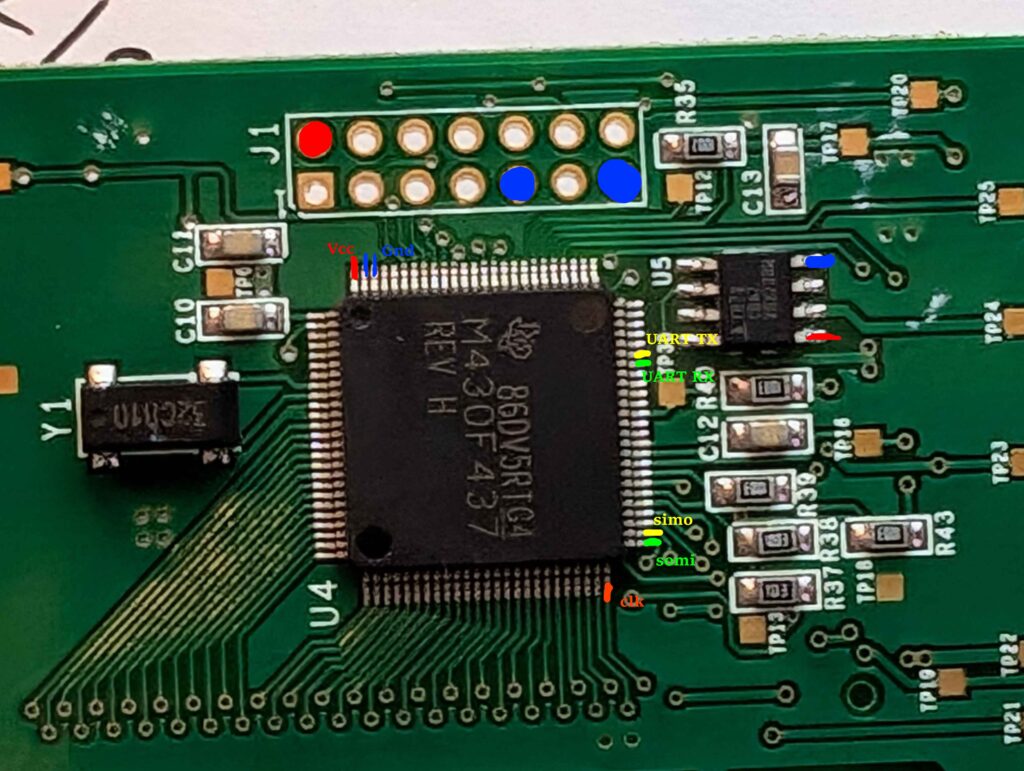
Inside the little beast, hides a msp430-series microcontroller. This is one of the first microcontrollers I bought a long long time ago when they had the launchpad deal and I pre-ordered it. Nonetheless, it was a nice surprise to see something I knew inside of a product! The only difference, mine was a dip package, while this one is a LQFP80. Sliiiihgghhhtttlllyyy different, and slightly less space inbetween the pins to hook wires ( That’s kinda an understatement ). According to the documentation, the pins are 0.3mm wide, and there’s 0.5mm inbetween each pin, center to center ( make the math, you’ll realize that there’s only 0.2mm in-between each pins. ). But I was not scared! I could tackle that challenge! I have tools, I have motivation and I have a thirst to learn! I’m unstoppable!!!
So first thing first, I had to figure out what kind of serial bus was available and which pins. I started by a nice session of multimeter beeping in continuity mode. With the help of the datasheet, I was able to easily identify a 3.3v Vcc pin and easy connection on the board. Same for the ground pins, there is a convenient set of test holes right next to the MCU. I was convinced that there would be the UART or the SPI connection in there… Nope. The UART pins seemed to be not connected to anything, while the SPI pins were used as output for the LCD panel. Well, I took it as a challenge to solder on the chip itself since there was no connections.

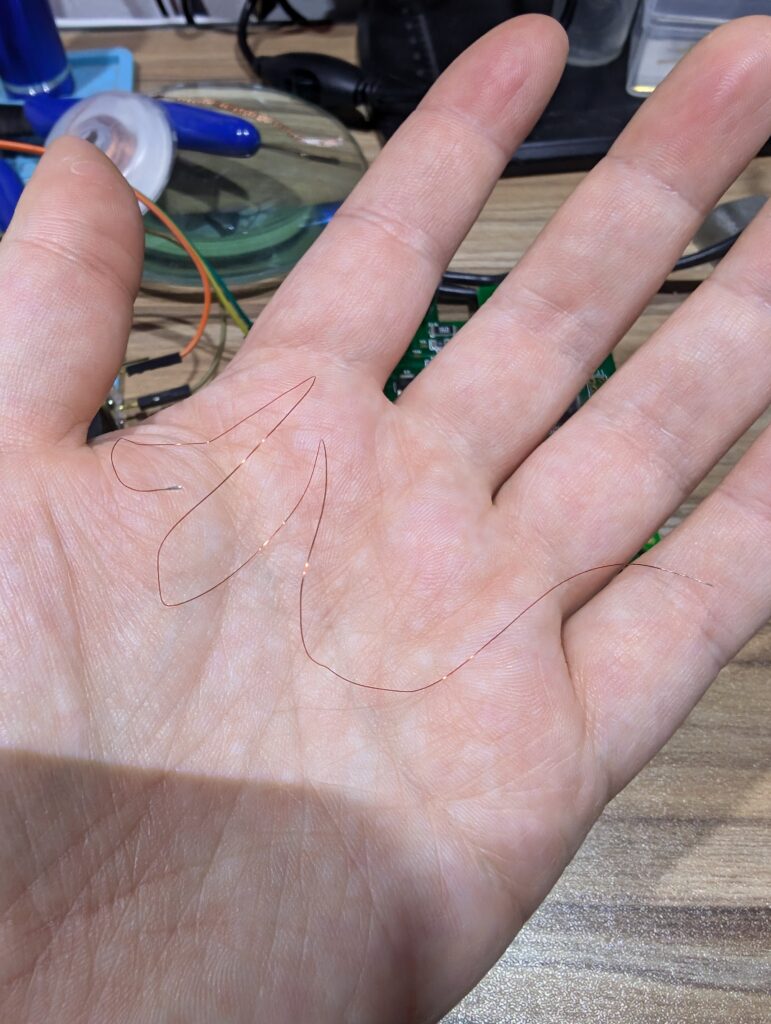
I first tried with wires that were way too big, and a soldering iron tip that was equally oversized for the job. After a few unsuccessful attempts, I decided to consider my other options. That’s when I recalled that I bought a much smaller tip for my iron that I never tried yet. It would be the perfect moment! And I dismantled some electric motors recently and kept the winding wire… Which it’s conveniently enameled copper wire, perfect fit for that kind of task!

So I tried to solder the enamel wire on the pins but every time I would successfully connect one, when I’d try to connect the second one, the radiant heat from the iron was enough to let the other wire get loose ( and potentially kissing the other pin with the iron but shhh ). In short, it was very difficult with my current setup and I was getting annoyed. That’s when I recalled that I’ve seen a post online ( probably on hackaday ), where the person shown a technique to lift pins to connect them. Considering that my UART pins were not going anywhere on the board, I thought that would be a great thing to try.
Indeed, it was a pretty good solution to my problem. It DID work even tho it was terribly ugly for a connection on a chip. It was meant to be temporary, just to see if I was able to get something from the UART port, and then I would have made something a bit more permanent to it… I did plugged everything, the terminal was giving me garbage as I was trying to find the baup rate and at some point everything went silent. I tried a bit of everything with no success to then realize that the chip pins had snapped. I probably moved something and the wire pulled too hard and broke the fragile pin. I ended up desoldering the chip to be able to investigate the board more in depth and, confirm that the UART pins were indeed not connected.
In the light of that experiment, I realized that what I tried to do was not trivial and that I would need to practice more if I want to get better. I also realized that I do need a better microscope or magnifier glasses or something, my old eyes aren’t that great anymore and it shows. On top of it, I had a great example of “can’t win them all”.
The good news is that my coworker still have a few other of these, so I might pester them to get another one, this time I’ll be very careful with the pins, and hopefully I’ll be able to get more informations out of that thing! If possible, I’d love to add a esp32 or something like that, with Wi-Fi, that could give me the info of the temperatures, without investing in fancy/pricy connected devices.
hope you enjoyed!


